Difference between revisions of "Installation"
From Ribbon Commander Documentation
(→Verifying Installation Success) |
|||
| (7 intermediate revisions by the same user not shown) | |||
| Line 1: | Line 1: | ||
| − | |||
== Prerequisites == | == Prerequisites == | ||
| − | The | + | The Ribbon Commander framework minimum requirements are: |
# Windows XP SP3 or later | # Windows XP SP3 or later | ||
# Office 2007 or later | # Office 2007 or later | ||
| Line 10: | Line 9: | ||
== Obtaining the msi package == | == Obtaining the msi package == | ||
| − | Visit [http://www. | + | Visit [http://www.ribboncommander.com www.ribboncommander.com] and follow the 'Download Latest Version' link. Unzip the compressed file 'RibbonCommander.zip' to obtain the msi installer package (RibbonCommander.msi). |
| − | + | ||
| − | + | ||
| − | + | ||
== Installing == | == Installing == | ||
| − | # Double-click on | + | # Double-click on RibbonCommander.msi or right-click and select Install. |
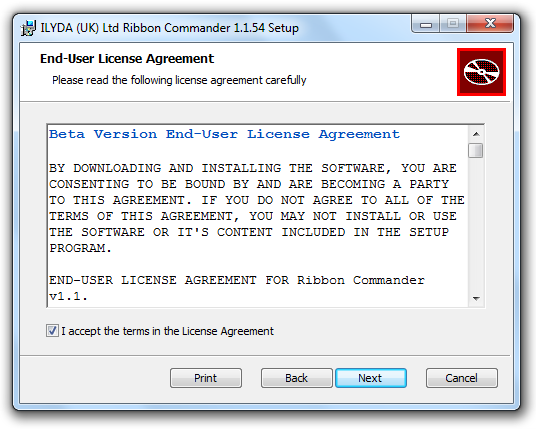
| − | # Read the License Agreement carefully and check the checkbox if you agree in order to proceed | + | # Read the License Agreement carefully and check the checkbox if you agree in order to proceed. |
| − | + | #: [[Image: RC_License_Agreement.png|link=]] | |
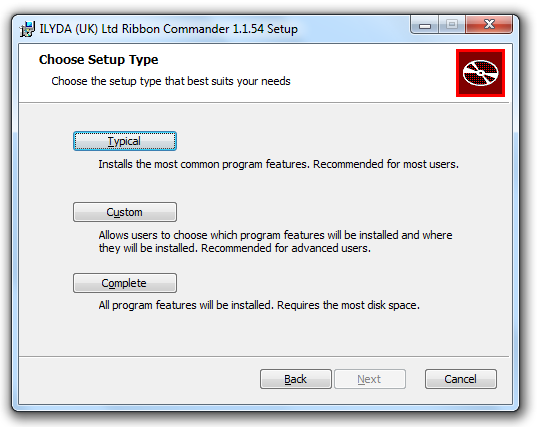
| − | + | # Click on 'Typical' to install all recommended components or 'Custom' to optionally exclude one or more (optional) components. | |
| − | #: [[Image: | + | #: [[Image: RC_Setup_Type.png|link=]] |
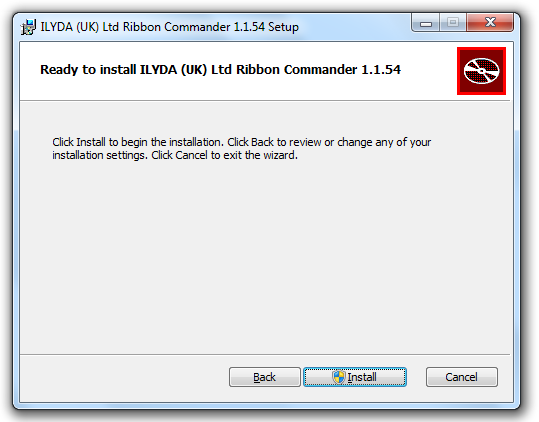
| − | + | # Click on 'Install' (this requires admin rights on the target PC). | |
| − | # Click on 'Typical' to install all recommended components or 'Custom' to | + | #: [[Image: RC_Installation_Confirmation.png|link=]] |
| − | #: [[Image: | + | |
| − | # Click on 'Install' (this requires admin rights on the target PC) | + | |
| − | #: [[Image: | + | |
== Verifying Installation Success == | == Verifying Installation Success == | ||
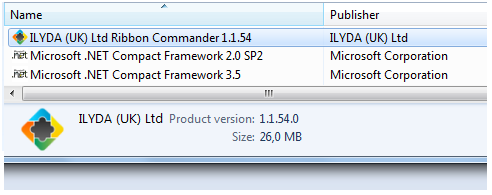
| − | *# Go to Control Panel -> Programs and Features (Add-Remove Programs on XP) | + | *# Go to Control Panel -> Programs and Features (Add-Remove Programs on XP). |
| − | *# Verify that | + | *# Verify that ILYDA (UK) Ribbon Commander has been added to the list. |
| − | *: [[Image: | + | *: [[Image: RC_Programs_Features.png|link=]] |
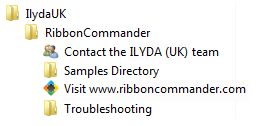
| − | * | + | * In Windows 7 Ribbon Commander also creates a Start Menu folder under ''Start''->''IlydaUK''->''RibbonCommander''. |
| − | *: [[Image: | + | *: [[Image: RC_Start_Menu_Folder.png|link=]] |
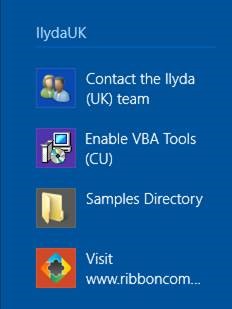
| + | * In Windows 8 the 'IlydaUK' Menu is created in the Start Screen. | ||
| + | *: [[Image: StartMenuFolderWin8.jpg|link=]] | ||
Latest revision as of 16:47, 8 November 2013
Prerequisites
The Ribbon Commander framework minimum requirements are:
- Windows XP SP3 or later
- Office 2007 or later
In addition, the installer requires:
- Admin rights on the target machine
- .NET Framework 2.0 (for the .NET library projections)
Obtaining the msi package
Visit www.ribboncommander.com and follow the 'Download Latest Version' link. Unzip the compressed file 'RibbonCommander.zip' to obtain the msi installer package (RibbonCommander.msi).
Installing
- Double-click on RibbonCommander.msi or right-click and select Install.
- Read the License Agreement carefully and check the checkbox if you agree in order to proceed.
-
- Click on 'Typical' to install all recommended components or 'Custom' to optionally exclude one or more (optional) components.
-
- Click on 'Install' (this requires admin rights on the target PC).
-
Verifying Installation Success
- Go to Control Panel -> Programs and Features (Add-Remove Programs on XP).
- Verify that ILYDA (UK) Ribbon Commander has been added to the list.
- In Windows 7 Ribbon Commander also creates a Start Menu folder under Start->IlydaUK->RibbonCommander.
-
- In Windows 8 the 'IlydaUK' Menu is created in the Start Screen.
-